
This one weird trick takes the hassle out of applying Lego stickers
Do Lego stickers make you want to scream? Here’s a handy tip to make applying them so much easier.
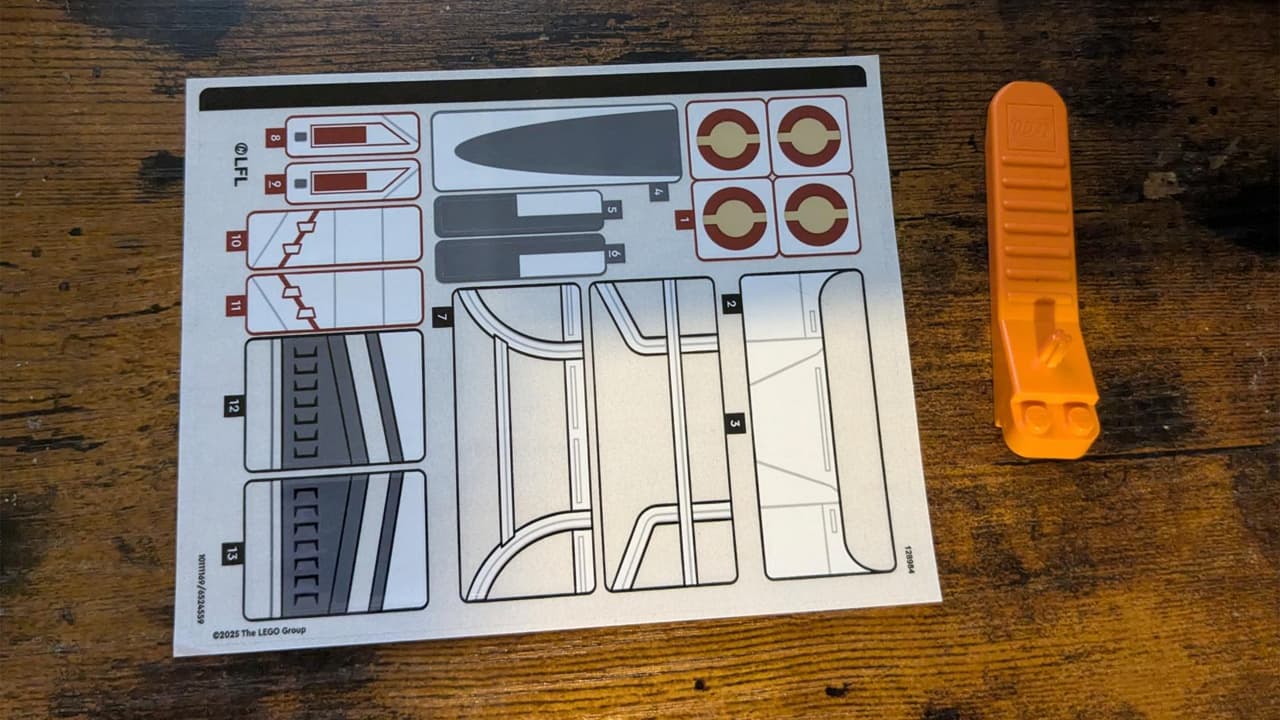
Do you love Lego but hate applying stickers? Do you get a sinking feeling when you unbox a set and discover 19 on one sheet? Yes, we’re looking at you, Lego Shuttle Carrier Aircraft. Then grab yourself a Lego separator and prepare to take all the hassle out of handling stickers.
We can’t take credit for discovering this trick, it’s been around for a while. But once you’ve got the knack there’ll be no more fluff or fingerprints on stickers. You also won’t spend half-an-hour applying and removing a sticker, with it getting more worn and crumpled each time.
All you need is a Lego set with stickers, a Lego Brick Separator (chances are you’ve at least one lying around) and a little patience. Here’s what to do, step by step.
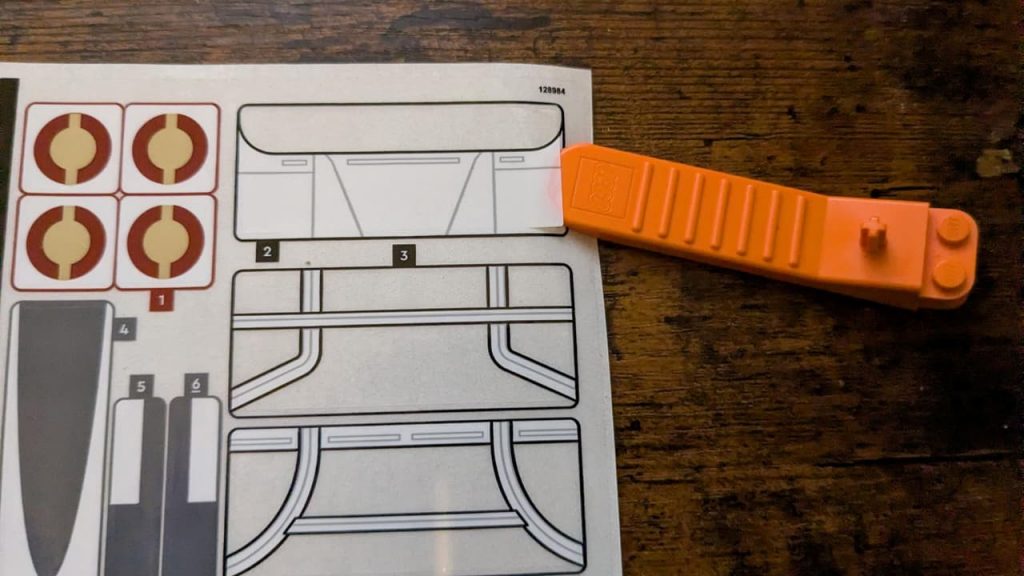
1. Hold the sticker sheet in one hand and the Lego Brick Separator in the other.
2. Flex the sheet slightly so that the sticker you want comes slightly away from the sheet
3. Slide the tip of the Lego Brick Separator under the edge of the sticker (see below).
4. Press down lightly with your other hand to ensure it sticks.
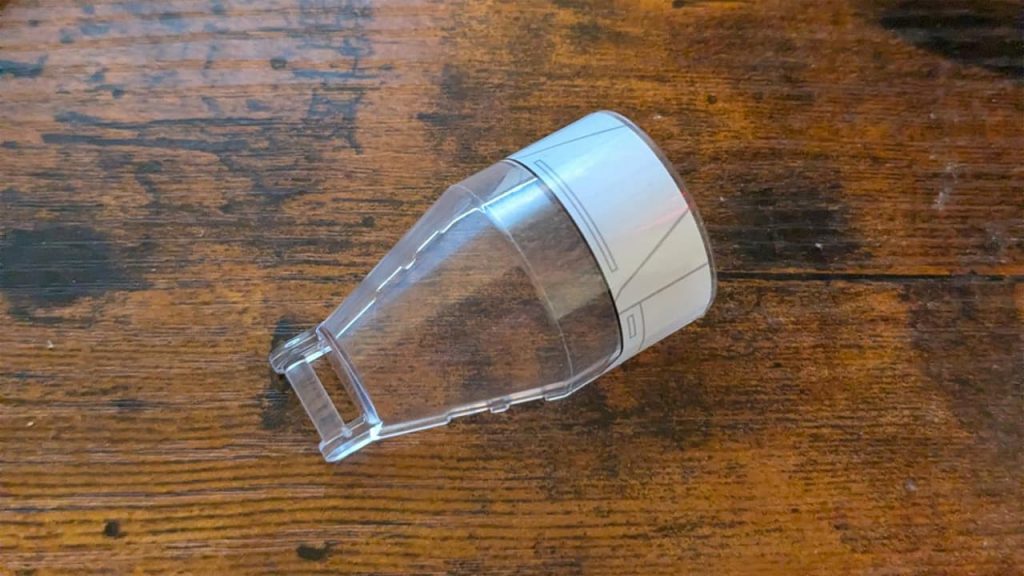
5. Now, with the sticker attached to the Lego Brick Separator, move it to the piece or model where the sticker goes
6. Line it up. You may notice that static pulls the sticker towards the piece, but don’t worry.
7. Stick down the free end and carefully lay down the rest of the sticker. If it’s not lined up, gently lift it up.
8. Finally, press down on the sticker to stick it in place.
Congratulations, you’ve applied your Lego sticker with the minimum of fuss. Lego’s own builders suggest you also apply a solution of soap and water to the piece, to make it easier to use, but we’ve managed without.
Related: Lego has unveiled the Smart Brick – Here’s everything you need to know
That’s all there is to it. It takes 90% of the effort and uncertainty out applying stickers, and you’ll wonder how you managed without it.